This is a very simple and easy way to add a STEAM project to you curriculum. The center of the sunflower is a Parabolic curve. Once you show this to the kids they will be drawing it everywhere. Their doodles will start to look like technical drawings.
What is a Parabolic curve you may ask... It is a curve where any point is at an equal distance form: a fixed point (the focus), and a fixed straight line (the directix).
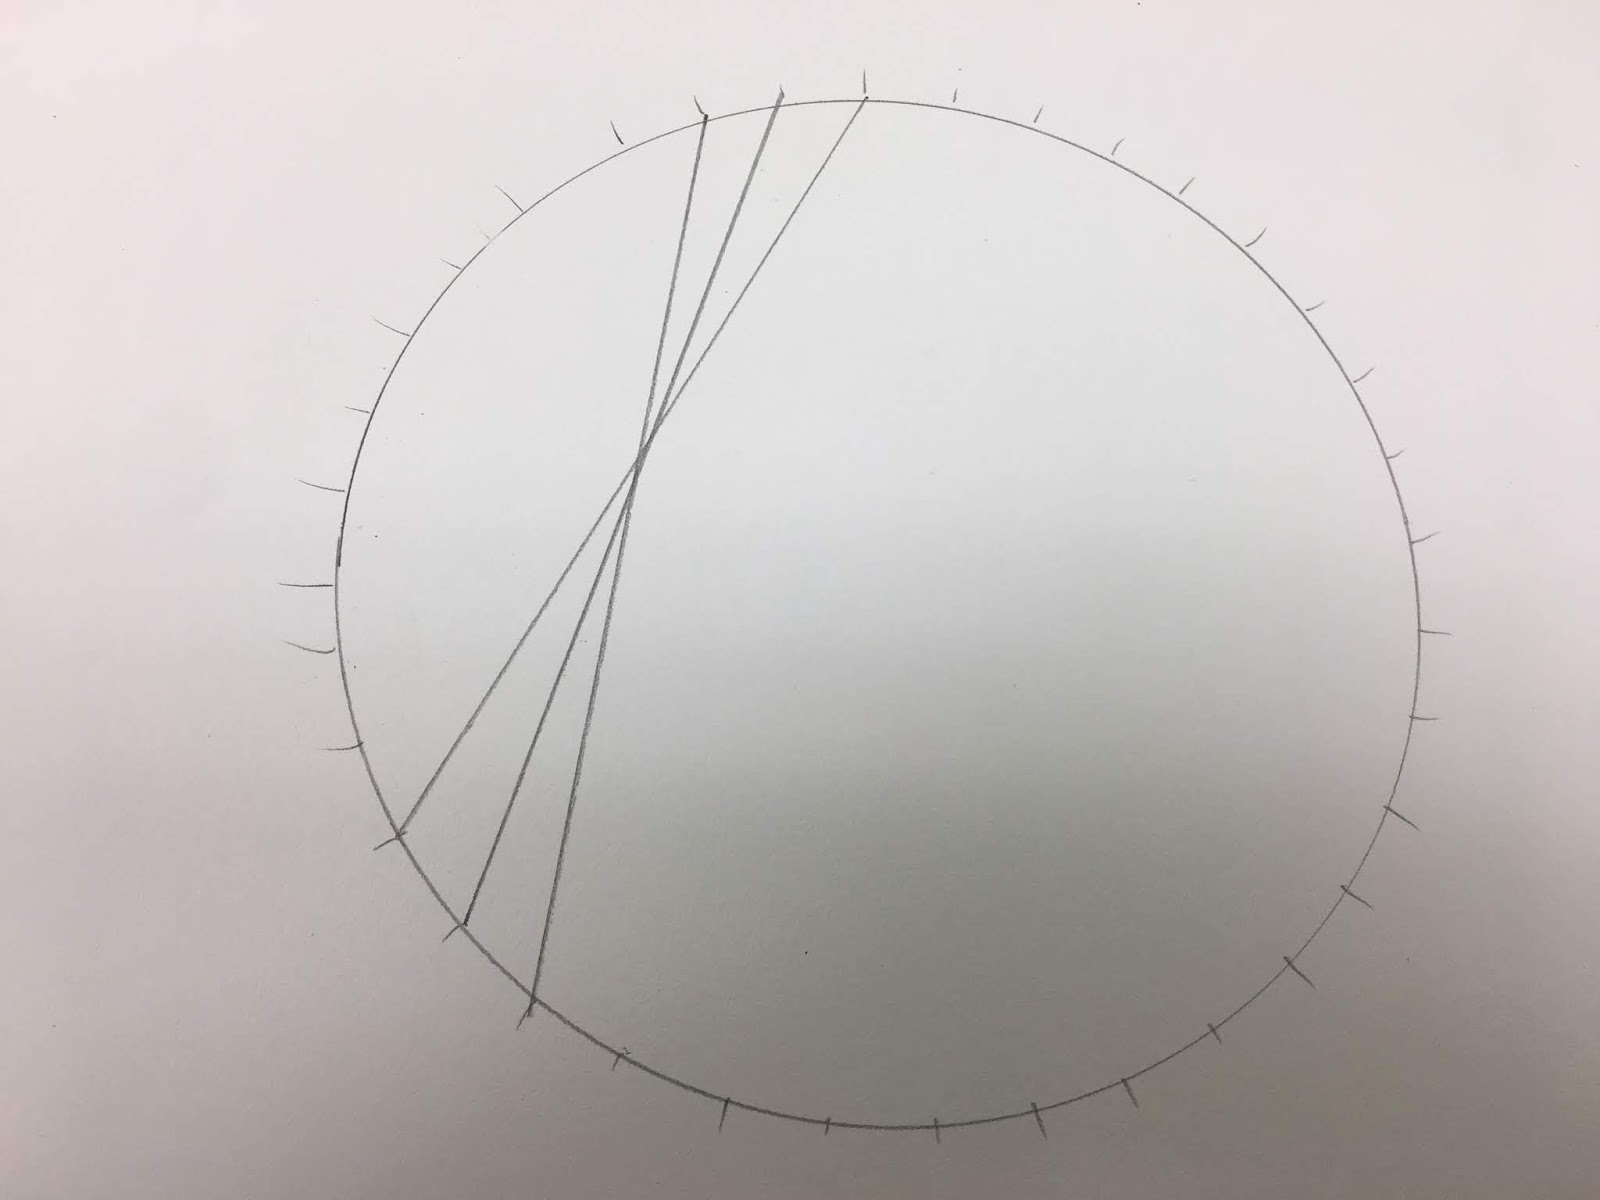
I simply tell the kids it's a way to draw circles using only straight lines. They say "no way" and then fall in love with the process.
To get started you will need a pencil, an ultra fine tipped Sharpie, a pencil, a ruler, a sheet of 12x18 white paper, a sheet of 9x9 inch black construction paper and a circular protractor. If you are not able to get a class set of the round protractors for your kids then just get one and trace it on white poster board, cut it out and number it..easy peezy!
Click
HERE to buy the Circular Protractor on Amazon
Step 1.
Using a pencil trace all the way around the circular protractor.
Make sure the protractor is placed in the lower left corner of the paper making sure to leave room to add the petals for your flower.
Step 2.
Place a hash mark by each whole number.
Step3.
Using a ruler connect two hash lines together. It does not matter which 2 you connect on the first one. Keep in mind the farther apart the connections the smaller the center circle will be. The closer the connection the bigger the center circle.
Step 4.
The next line connection will be the next two hash marks.
Step 5.
You should continue all the way around the circle until every hash mark has 2 lines touching it.
Step 6.
Put down your pencil an get a ultra fine tipped Sharpie.
Step 7.
Repeat the same process however this time change the distance of your first line connection.
Remember the farther apart the connections the smaller the center circle will be. The closer the connection the bigger the center circle.
Step 8.
Using your Sharpie add the petals. Connect your petals from one hash mark to the next.
Also take this time to outline the large circle you drew with the protractor in Sharpie.
Continue...
All the way around your circle.
Step 9.
Watercolor paint...
I used red-orange, orange and yellow at the last ring before the center.
I used yellow-orange on the petals and brown and yellow-orange at the center.
Step 10.
Cut out your flower in a circle first then cut out each individual petal. This will make your life much easier!!! Cut out your petals in a bubble cut...meaning you leave a little white showing.
Step 11. (optional)
Use a round object or tool and run it around the outside edge of your flower between the flower and petals.
This process will help you bend the petals up.
Step 12.
Glue the Sunflower to the center of a sheet of 9x9 Inch black construction paper.
Step 13.
Use a stencil brush or toothbrush to splash brown watercolor paint over your flower.
Step 14.
Now use white tempera paint and flick it all over your flower and black paper.
The next section is optional...
Trace 1/2 way around your protractor, add the hash marks to EVER OTHER whole number.
Connect the petals to each hash line. Make sure these petals are slightly bigger then the previous ones you created on your flower.
Repeat the same step again this time trace slightly bigger then 1/2 the protractor.
Out line them with Sharpie, paint them and then cut them out.
Attach them with glue around the outside of your flower.
TaDa....A parabolic sunflower.
Option...
You can use the circular protractor to connect the lines instead of a ruler. It's not a parabolic curve anymore but it's awesome!